How YOU Can Use Computer Vision to Avoid Touching Your Face!
When COVID-19 was first starting to spread, well before people outside Wuhan were sheltering-in-place and social distancing, the sole advice being spread on social media was to not touch your face. This led me to a terrifying realization: I touch my face a lot. Like, a lot.
Of course, working in technology, I’m cursed to view every problem as one that can be solved with software. I ended up building a website that uses your webcam data and some machine learning to determine whether or not you’re touching your face. The instant a stray finger scratches your nose or repositions your hair, the app loudly honks at you!
My original prototypeIf your fingers are loose, you'll get the goose!
— emilia ✨ (@lazerwalker) March 4, 2020
Built using @azure Custom Vision Service. Tutorial + blog post coming soon! (🔈on!) pic.twitter.com/cHKzTbzl0u
This is built using a tool called Custom Vision, part of Microsoft Azure Cognitive Services, that makes it easy to train your own deep learning computer vision model. This was my first time using Custom Vision, or any sort of method at all of training a custom machine-learning model to do CV. I was amazed at how easy it was to train a working model!
It turns out “training a machine learning model” isn’t some scary piece of dark arts that requires you to have a PhD in machine learning. As I walk you through my journey, you’ll learn as I did that it can literally be as easy as uploading some images to a website!
First Try: Face Detection!
At first, building a custom model didn’t even cross my mind. I started by playing around with a few other high-level APIs within Azure Cognitive Services, such as the Facial Recognition service. It basically exists to answer questions like “are there faces in ths image}” and “if so, where are they in the image?”, but it happens to also return data about whether or not those faces are occluded.
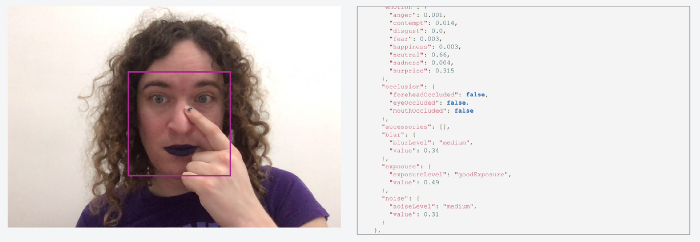
It works really well, but the data is incomplete! You can see in that API response above that it includes some occlusion data about whether a face’s eyes, nose, or mouth were covered, but nothing as broad as “there is something covering any part of the face”. It seems likely the service has that data somewhere, but it sadly isn’t exposed to us as users of that API.
Second Try: A Custom Vision Model!
After speaking with a coworker, I was pointed in the direction of Custom Vision. It offers an easy drag-and-drop way to train custom vision models: just upload some images, tag them, and let the machine learning model figure out the rest.
Specifically, it uses a powerful technique called transfer learning. Instead of training an image-detection neural network from scratch, it’s starting with a very large pretrained model that has awareness of all sorts of images. When I upload images of people’s faces, and people touching their faces, that gets used to subtrain the existing model. It’s like the neural network is starting with some base knowledge of what a face is and what hands are, I’m just helping show it what I’m particularly interested in.
It goes without saying this is all a massive simplification of what’s happening under the hood. I’m not a machine learning expert; the good news is this stuff is easy enough to use that I don’t need to be!
What’s great about this approach is it requires shockingly little data. I wrote a small script to fetch a few dozen images each from Bing Image Search for the terms “face” and “touching face”.
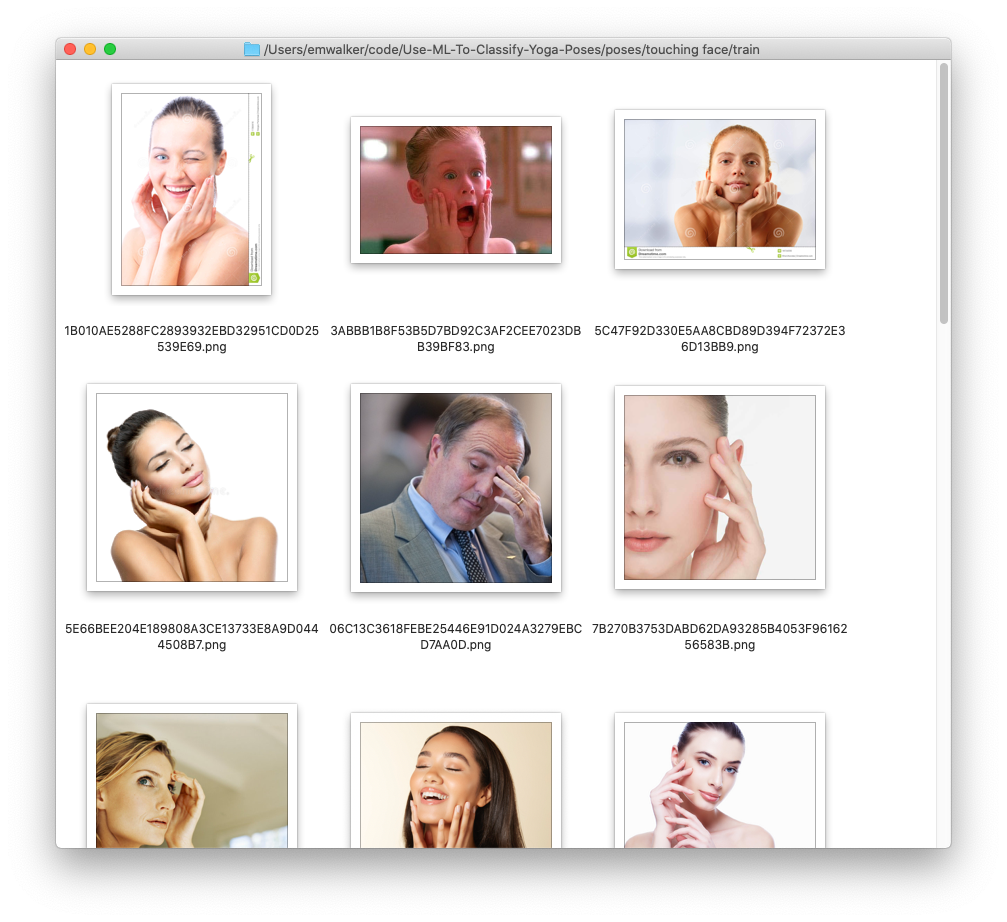
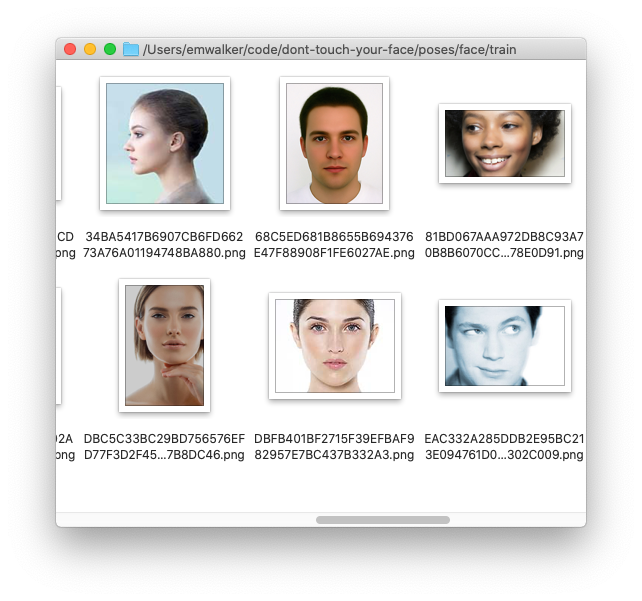
From there, I just created a new project in the Custom Vision dashboard, selected a model (“General” made sense!), uploaded my images, and tagged each of them (so each image was either “touching-face” or “not-touching-face”).
With the dataset in place, clicking “Train” took maybe 10 seconds to generate a functioning model, and I was given an API endpoint and secret key that would let me send image data and get back a response.
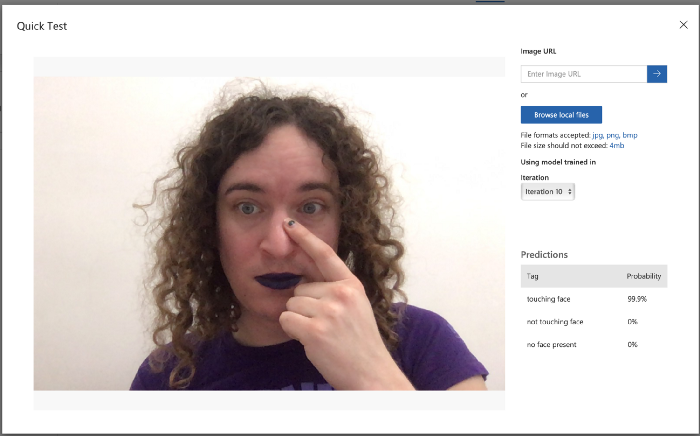
Shockingly, this worked really well! I built a quick webapp as a test, and while it got confused if there were no people visible at all and sometimes wouldn’t trigger if I was touching the very corner of my face, it was completely usable! I was blown away.
A Catch: Rate Limiting?
It’s great that this worked so well! However, while it worked really well as a tool for me to use for myself, it sadly wasn’t something I could release to a wider audience.
The way my original demo was written, I had a timer running 10 times a second to snapshot the current video feed and send that image up to the server. After some informal testing, this was a pretty good interval; if I ran it less frequently, it felt laggy and sluggish.
However, Custom Vision currently only lets you make at most 10 API calls per second for any given prediction model. Given I was already making 10 API calls per second, that meant this approach was impossible to scale beyond a single user!
Third Try: A More Compact ML Model!
Reducing the number of API calls to Custom Vision wasn’t really doable. Even if I changed the app to only send an image to the server once per second - which would make it basically unusable! - that meant I could have a grand total of ten simultaneous users. A fundamentally different approach was needed.
I noticed that Custom Vision lets you export your model for use in a number of other environments. One of these is TensorFlow.js, which runs directly in the web browser. If I could do that, I wouldn’t need to worry about API limits at all!
The bad news is that I needed to train a new model. The reason the previous model was so effective with so few sample images is because the corpus of images it had been pre-trained on was huge. As a result, that model was very large and computationally expensive to use. While this is fine when it’s running on Azure servers in the cloud, that makes it difficult to run in user’s browsers!
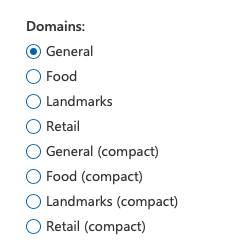
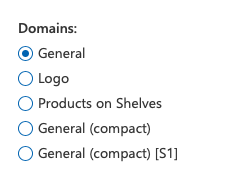
Available domains for classification (left) and object recognition (right)
When creating a new model, Custom Vision gives you a handful of different pre-trained models you can base yours off of. Previously, I’d just used the “General” domain. However, selecting any of the pre-trained models labeled “compact” means you’re starting with a smaller domain where your final model will be suitable for export to environments ranging from browser JavaScript to native iOS and Android to GPU-powered IoT devices.
The natural next step was to create a new model with a compact domain and re-train it Sadly, the results for just those 30 images were nowhere near as good as the original model.
This makes sense if you think about it: a smaller domain for our transfer learning means it’s going to have less initial context, which means it needs more training data to get a feel for what we’re asking of it. I tried scraping a lot more generic images from Bing Image Search, but upping the number of images didn’t make a difference. I needed categorically better data.
I took a bunch of photos of myself using my webcam. Even with a very small dataset, this already seemed more promising (at least, testing it myself) than the stock image approach, but I needed a lot more data.
So I built a tool! Based on a coworker’s Custom Vision workshop project, I made a website that walks people through taking photos with their webcam, tagging them correctly, and uploading them straight to the Custom Vision portal.
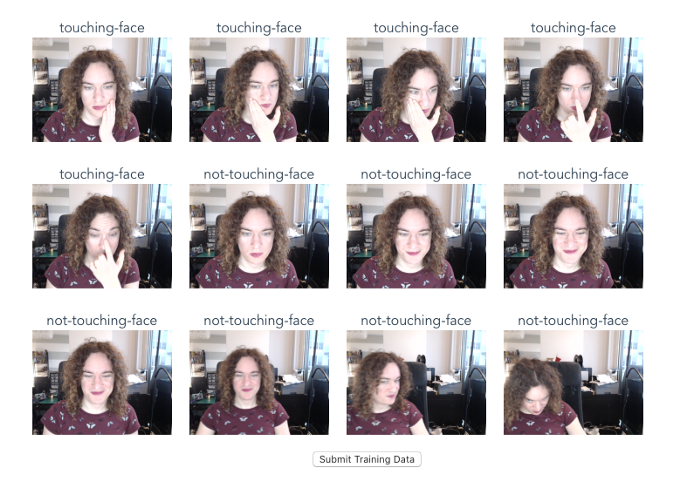
You can play with this tool live online, and even submit some data if you want! If you’re interested how it works, I’d recommend checking out my colleague’s workshop, but in broad strokes this quickly gave me a web-based tool I could send to friends and colleagues to help me generate a lot of data quickly.
After gathering 200–300 images each, results started looking better! The resulting model still wasn’t up to the quality of the original one, but it was within the realm of what I could control with some simple heuristics in code.
In other words: the default way you’d build something like this is to say “if the probability of the ‘touching-face’ tag is over a certain number, the user is touching their face!”. Instead, I’m being ever-so-slightly more nuanced, and looking at the relationship between the probabilities of both the ‘touching-face’ and ‘not-touching-face’ tags to figure out whether the user has touched their face or not.
Building it out into an actual webapp!
Now that I had something that actually worked well enough - if not perfectly - entirely within the browser, it was time to flesh out the actual experience of using it!
You can try the experience yourself if you’d like! I felt it was important to give users the options of different sounds, and also add in features like letting them trigger system alerts that would foreground the page if they wanted to keep the app open in a background window.
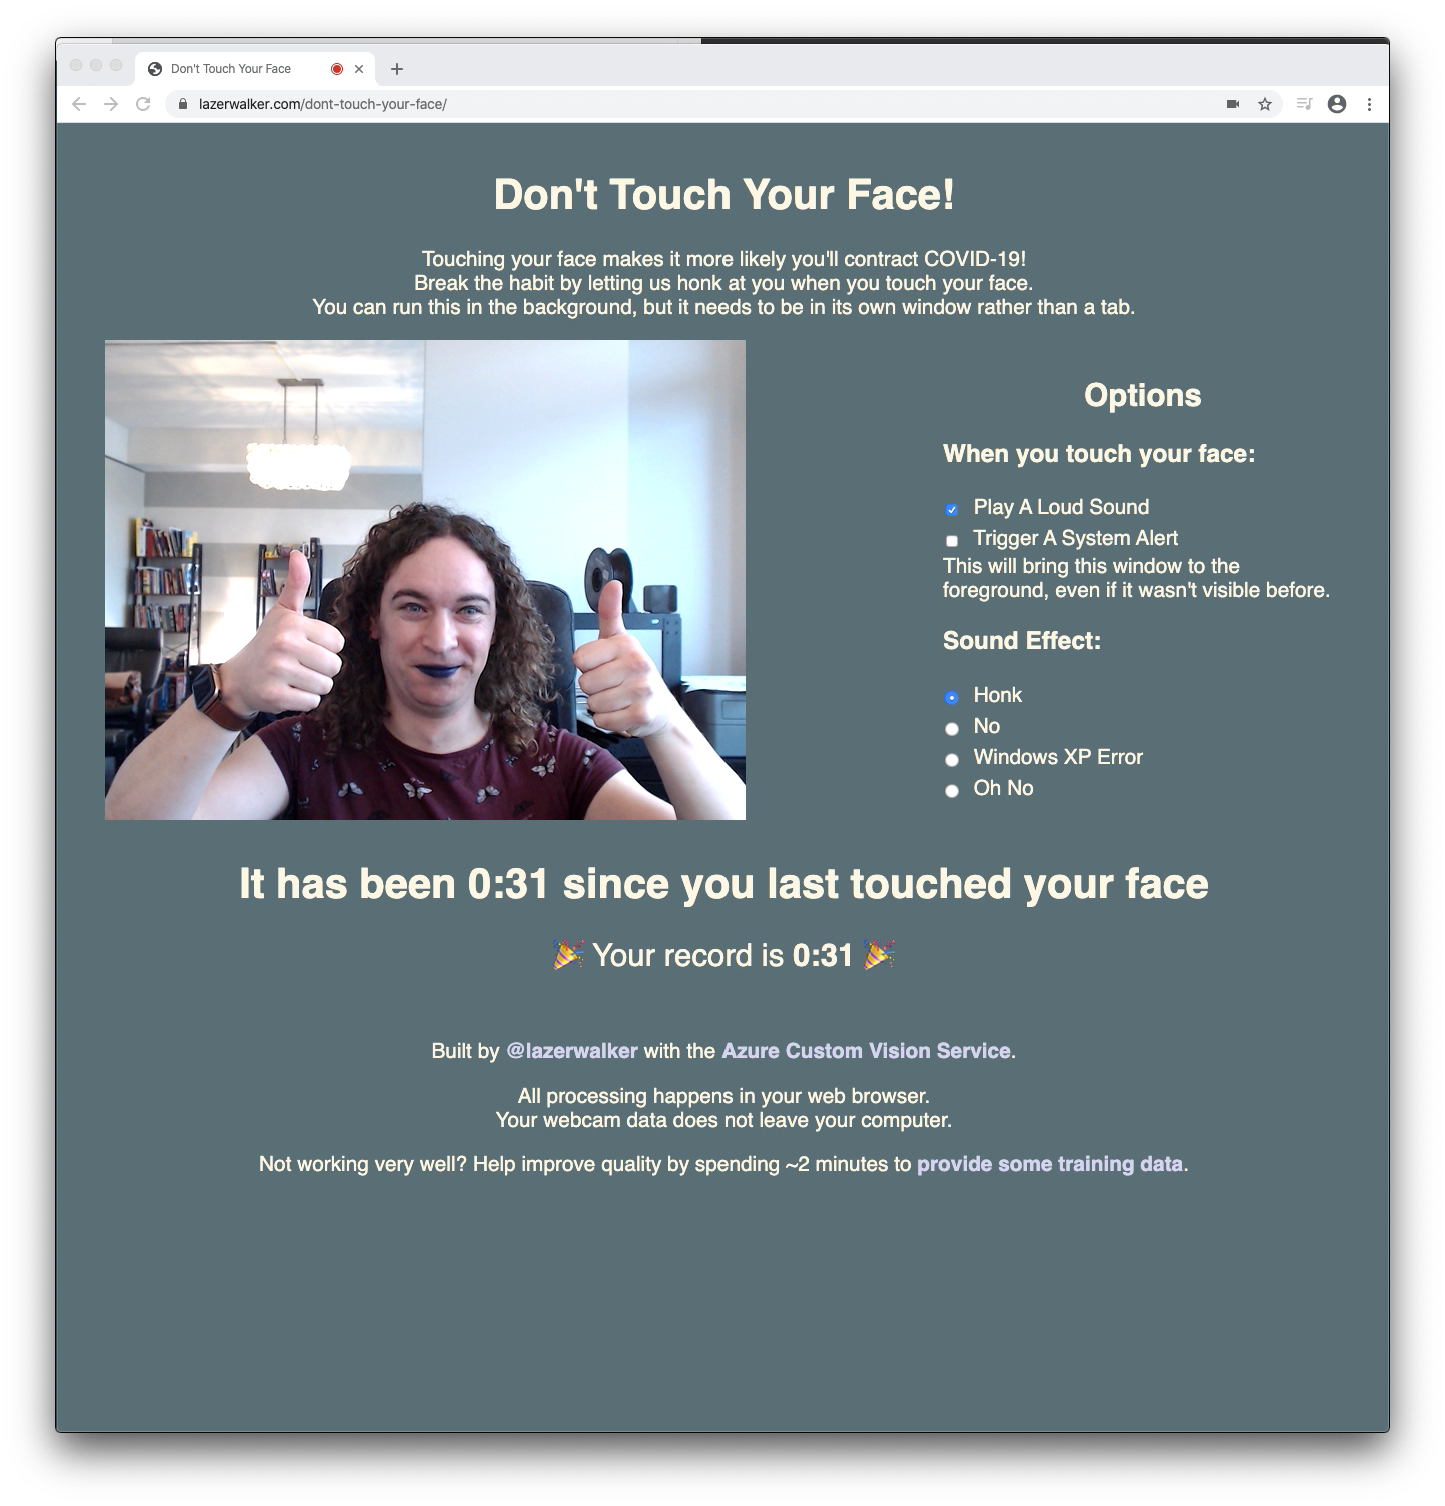
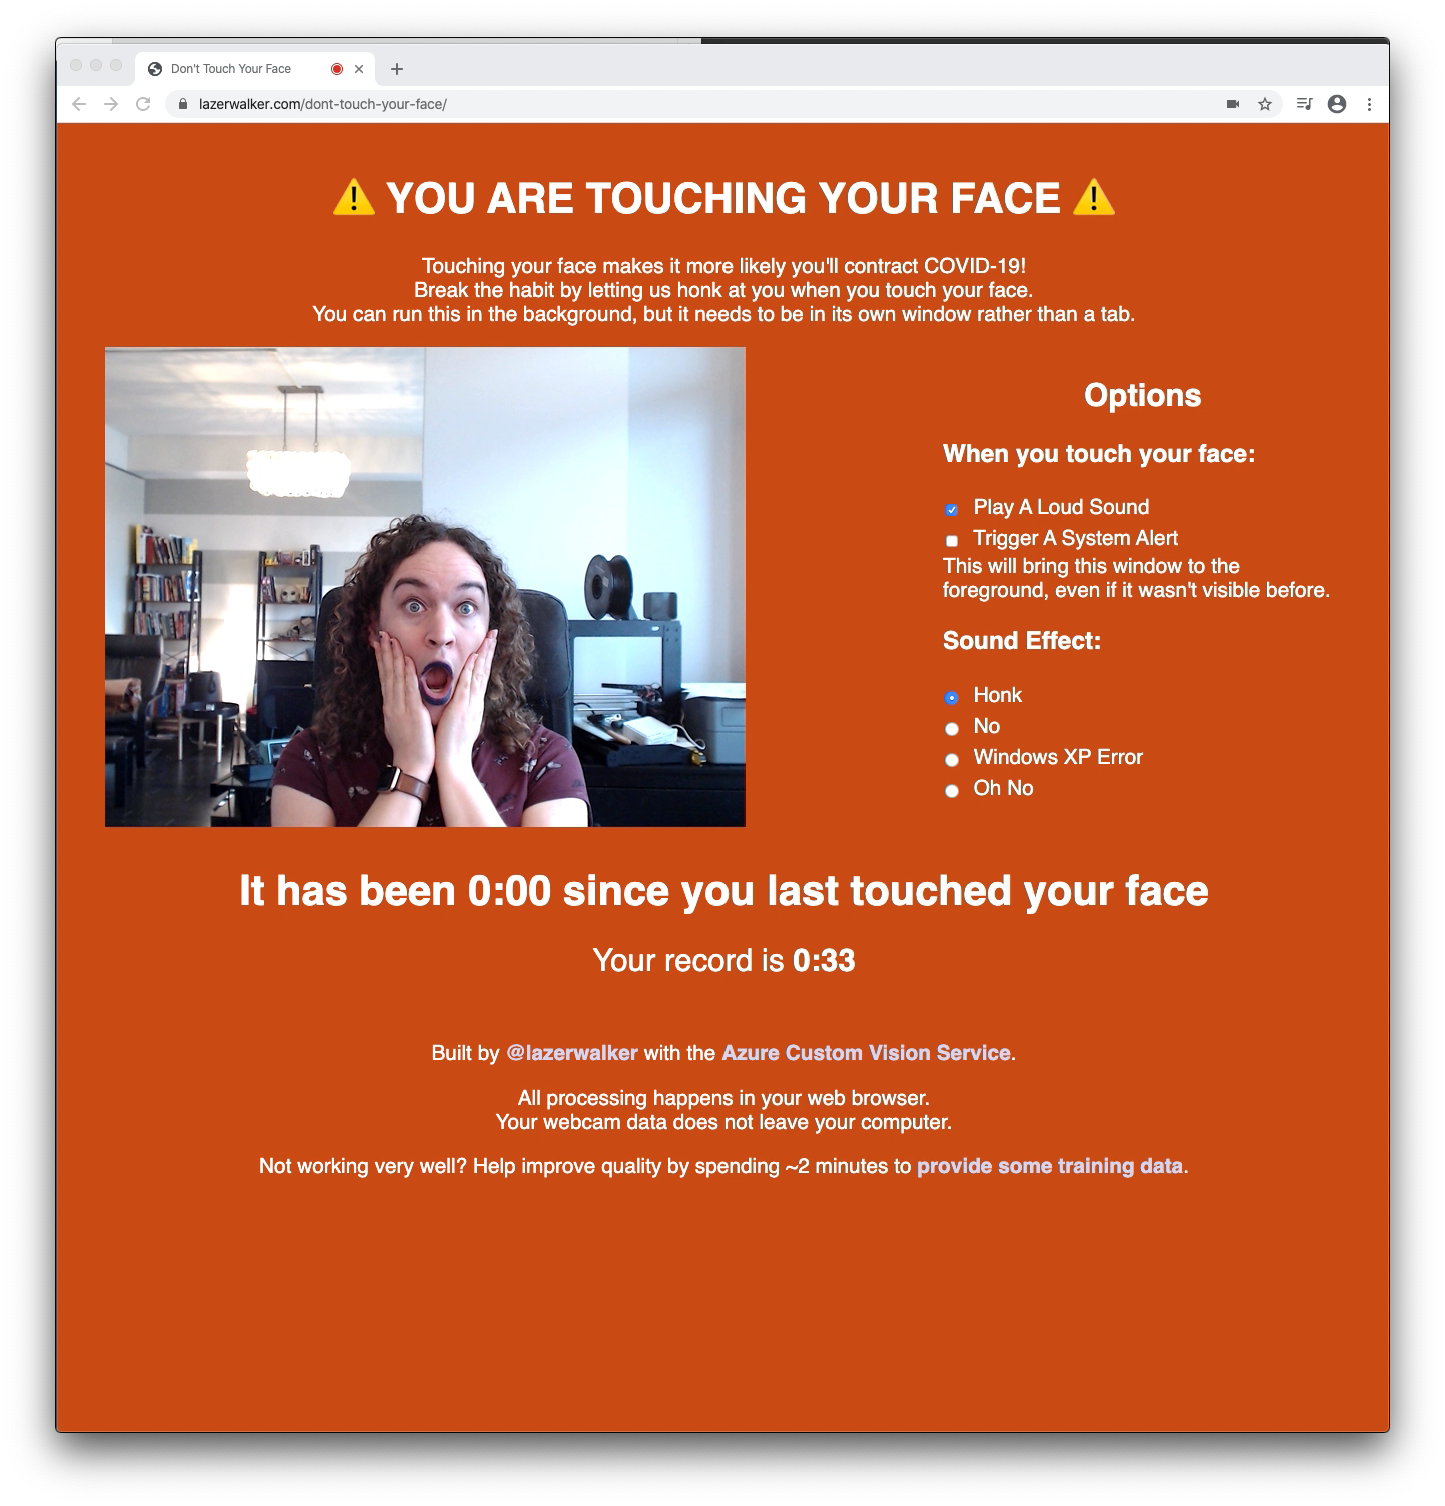
The live webapp as it exists today
I’m perhaps happiest with the ‘high score’ tracker at the bottom. I considered adding in Twitter authentication so that you could see a live leaderboard of all your friends via PlayFab, but that seemed like a lot of complexity. Giving you a personal best to beat seemed like a much simpler way to give people some sort of extrinsic motivation to do better.
Another design decision I’m particularly proud of was including a link to my training data page. I’ve been overwhelmed at how many submissions I’ve received from strangers. I now have more than ten times as much training data, which means when I have the time to experiment I should be able to make it work much better!
I’m still figuring out what other cool things I can do with my trained model - I’ve exported it to Apple CoreML and am experimenting with building a native macOS app that lives in your menubar, and I have a colleague who’s been getting it running on GPU-accelerated IoT hardware.
But above all, I’m excited that I’ve gained a new tool in my toolbox for building things. I literally would not have imagined before building this just how easy it is to build your own machine learning model to do object recognition or image classification. Now that I (and now you!) know that awesome AI/ML tools like the Custom Vision service exist, I’m excited to go out and build more weird things that are aware of objects in the world!
If you liked this post, be sure to check out Azure AI April, where new articles like this will be posted every day throughout April!